On this page
The proxy client shows “Connected,” and most people immediately open their account dashboard. That’s where the trouble starts.
“Connected” only means the network path works. It doesn’t mean the website sees what you think it sees. You might be running a Hong Kong proxy while WebRTC still leaks your local IP. Or your browser fingerprint reports a timezone and language that don’t match your IP location. Individually, these details seem minor. Together, they scream “environment anomaly.”
This guide walks you through a complete verification process. No technical background required—just check four things in order within the same environment: exit IP, WebRTC, DNS, and browser fingerprint. When you find issues, don’t panic. Note them down, change one variable at a time, then retest.
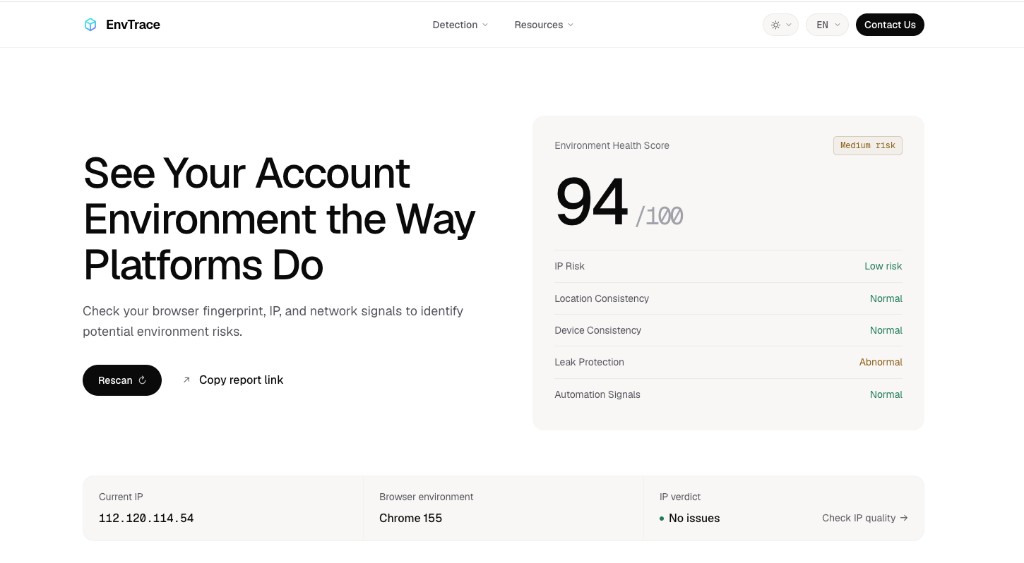
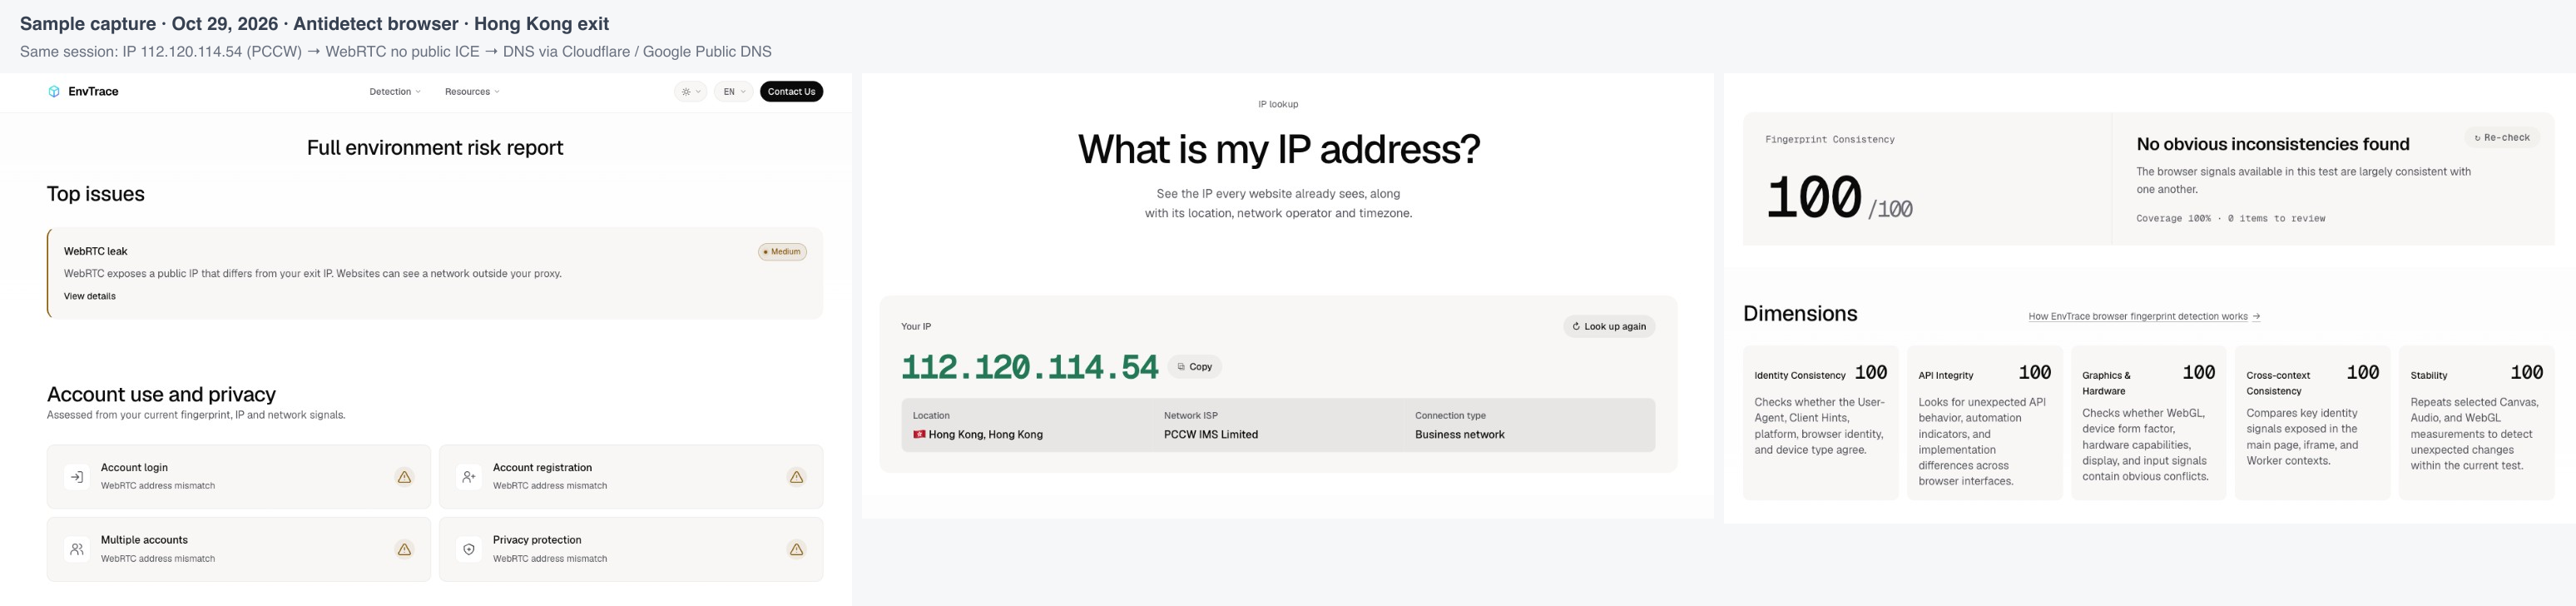
About the screenshots: The captures below were taken on October 29, 2026, in a single antidetect browser environment with a Hong Kong exit (112.120.114.54, PCCW). Configuration screens are redacted and contain no proxy credentials.
Step 1: Confirm Which Environment You’re Testing
The core value of an antidetect browser is environment isolation—each profile has its own cookies, cache, fingerprint, and proxy settings. This means results from Profile A tell you nothing about Profile B.
So before opening any testing tool, confirm: the window you’re currently using is the exact environment you plan to work in. Don’t copy test links to your daily Chrome browser. Don’t compare screenshots from a different profile. Each environment’s data is isolated; mixing them only confuses yourself.
Before starting, jot down a few details: environment name or ID, browser version, proxy protocol, expected exit country, and session type (sticky or rotating). If you’re using rotating proxies, also confirm whether the current task needs constant IP changes or a stable address. You’ll need these notes for troubleshooting later, but remember not to write down proxy passwords.
Step 2: Does the Website See the Right IP?
In your target environment window, open the IP Lookup tool. Note the public IP, country, and ISP shown. These three should match the information your proxy provider gave you.
Here’s a nuance: the proxy entrance address (what you entered in the config) doesn’t always equal the exit address. Especially with residential or mobile proxies, the entrance might be a gateway while the exit is the actual assigned IP. If the country or city shown doesn’t match expectations, don’t immediately blame the provider—refresh the page and check again. If you selected sticky sessions but the IP keeps changing, the issue is likely in the session persistence settings, not the proxy itself.
Also distinguish between two concepts: “proxy is working” and “this IP is clean” are different things. Being able to connect is just the first step. Whether this IP was previously used for spam, whether it’s flagged as proxy/VPN, and its abuse risk score—these are what platform risk control actually cares about. If you need to verify these, run the IP Quality Check separately. But don’t draw conclusions from a single label; no platform bans accounts based solely on one blacklist entry. They use multi-dimensional scoring.
If the IP is indeed wrong, troubleshoot in this order: first confirm you selected the right environment, then check if proxy credentials or protocol type are correct, then look for interference from system VPN, browser extensions, or routing rules. Don’t touch browser UA or WebGL settings yet—that comes later.
Regarding city-level geolocation, different databases vary widely in accuracy. Don’t declare the proxy dead just because the city name doesn’t match—cross-check multiple data sources first. Browser timezone should match your actual work location; language can follow your usage habits. Real users naturally have various combinations, so language doesn’t have to perfectly match the IP country.
Step 3: Are WebRTC and DNS Going Astray?
IP confirmed, next check two commonly missed areas: WebRTC and DNS.
Open the WebRTC Leak Test and compare the addresses shown with the web exit IP you just recorded. WebRTC is the technology browsers use for video calls, and it can expose network addresses when establishing connections. Focus on whether any unfamiliar public IPs appear.
Avoid these common misjudgments: addresses starting with 192.168 are LAN addresses, and device names ending in .local don’t count as real public IP leaks—they’re just local network info. If you see another public address, first determine if it’s a relay node or an intentional secondary line you opened.
If you confirm your real local public IP is exposed, pause account operations in this environment and check the environment’s WebRTC mode and proxy UDP support. But don’t disable all communication features just to eliminate the warning—both AdsPower and Multilogin documentation warn that completely disabling WebRTC may break voice/video call functionality, and some platforms find fully disabled WebRTC suspicious.
Next, run the DNS Leak Test and note which DNS servers are responding and which network they belong to. The principle here: DNS server location differing from IP location isn’t necessarily a leak. Many proxy providers use public DNS (like Cloudflare or Google) for resolution—this is normal operation.
What you should watch for: if you find DNS resolving through your local ISP’s servers when you intended all resolution to go through the proxy, then check remote DNS settings, browser secure DNS (DoH), and routing rules. If the test times out or returns no results, mark it as “incomplete” rather than guessing causes.
Step 4: Fingerprint Five Dimensions—Look for Coordination, Not Just Scores
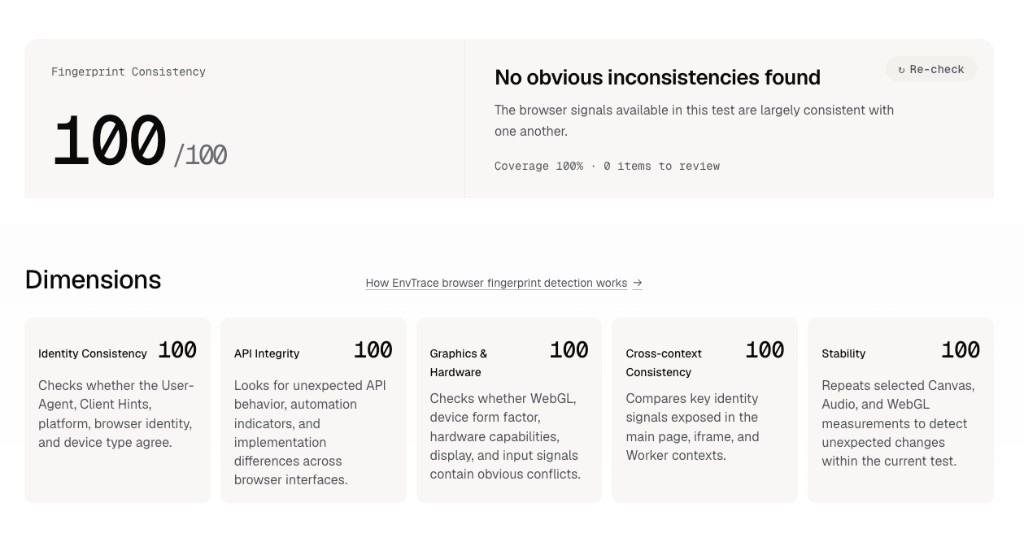
Network layer confirmed, finally check browser fingerprint. Open the EnvTrace Browser Fingerprint Test. First look at coverage and dimension status, don’t just stare at the total score.
| Dimension | What to Check |
|---|---|
| Identity Consistency | Do UA, platform, and Client Hints align? If UA claims Windows but Client Hints report macOS, that’s an obvious conflict. |
| API Integrity | Are browser interfaces functioning? If Canvas or Audio APIs error out or are missing, check recently installed extensions or scripts. A single API anomaly isn’t necessarily bad, but multiple simultaneous anomalies warrant attention. |
| Graphics & Hardware | Do WebGL rendering results, screen resolution, and device type match? If UA claims mobile but screen resolution is 4K desktop, that’s inconsistent. |
| Cross-Context Consistency | Are identity fields consistent across main page, popups, and background workers? Some modifications only change the main page but miss background threads—that’s a giveaway. |
| Stability | Does data jump around within the same test session? If Canvas fingerprint changes every refresh but timezone stays fixed, that combination rarely occurs in real users. |
These dimensions come from the product’s public methodology. Missing data doesn’t mean passing; internally consistent browser signals don’t guarantee timezone, language, and current IP are aligned. Real user environments naturally have various “imperfections”—the key is whether these imperfections tell a coherent story.
Found Issues? Fix in This Order
| Symptom | First Action | Verification After Fix |
|---|---|---|
| Exit IP wrong or constantly changing | Check proxy settings, routing rules, session persistence | Exit matches expectations, then check other items |
| WebRTC shows unfamiliar public address | Identify address source first, then adjust WebRTC mode | Recheck address, confirm required call functions work |
| DNS shows unfamiliar ISP | Check resolution path and secure DNS settings | Reconnect, rerun DNS test |
| UA conflicts with other identity fields | Roll back recent identity changes | Restart original environment, verify fields |
| Graphics or API anomalies, low coverage | Check extensions, permissions, privacy settings | Items readable, or document reasons for follow-up |
After Each Fix, Keep Records
Tuning isn’t a one-time thing. Keep pre-modification screenshots or notes, change only one variable at a time, save and restart the original environment as required by the product. Then retest in the original order, recording: time, exit IP, abnormal fields, what changed, results, and remaining items.
After network path changes, run a complete retest—don’t just check if the previous red warnings disappeared. Exit matches expectations, no unexplained public paths, no obvious conflicts in key fields—only then is this round of verification complete. If problems persist, send redacted fields and version info to your browser or proxy provider. Looking for specialized testing tools? Check the six fingerprint test sites comparison.